How to create the perfect SOLIDWORKS weldment profile?
To most CAD administrators, this is an essential topic. Fortunately, there is tons of information floating around on the internet with some pretty good examples.
So, should you ask why you should keep reading, then I’d tell you that the most important topic, Weldment and Cut List Data Management, is not covered by the results on the first page of Google.
Today, you can look forward to getting a better understanding of your next steps in the world of data management.
No time-back guarantees though!
Profiles creation method
As forementioned there are tons of instructions available online on how to draw geometry. The usual approach for doing it is to draw the shape of a profile and then use Excel to create all of the required configurations. This is fine, as long as one doesn’t want to create dozens or hundreds of individual sketches and files. Additionally, to no one’s surprise, Excel comes with equations! You can create simple equations that collect dimensions and convert them into meaningful configuration names and descriptions, avoiding brute input.
Here’s an example of using a circular bar to choose whether length shall be shown in the description field or not. In length field length shall be visible anyhow.

On another note, why and where should you show length? What can be behind this question?
What to show in Cut List/BOM
There are two competing opinions on where the right place to show weldment profile lengths is.
One roots for the description field and the other desires a separate field. Both solutions are driven by data management needs.
To visualize how a Cut List would look like for a sample part take a look at the following. The first case portrays it in the description field and the second one shows it as cross section info.
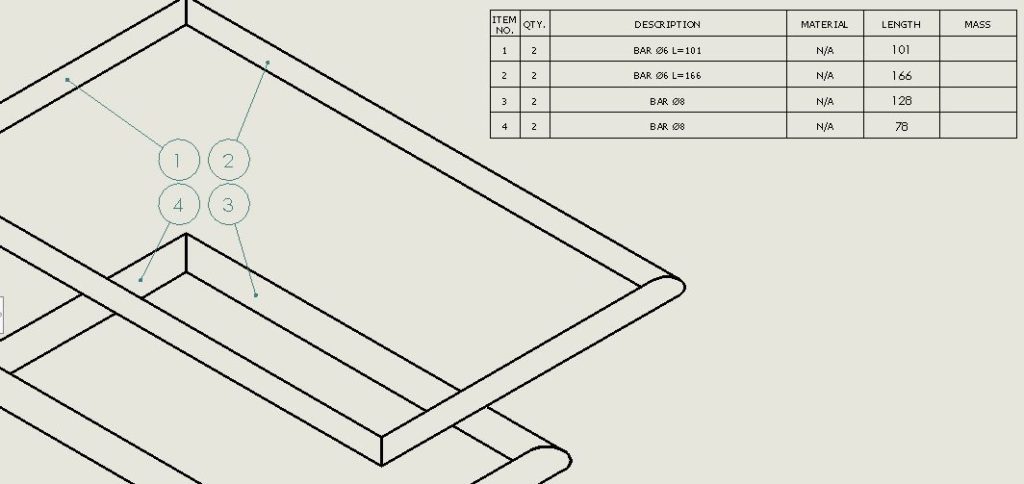
When the description is written into the description field, you get that nice format in case you intend to use it in BOM or assembly drawings as well.

It can be beneficial to have length appear in one field. Who needs the separate length at all?
Excel subtotals
The importance of a separate field and description without length is more useful in the production stage. Typically when work moves out from the engineering table, the need to analyze how much raw material is needed becomes evident and somehow sorting all the same profiles into one table to see the total length becomes important.
Let us see how this can be done in Excel after the Cut List is exported to Excel format.
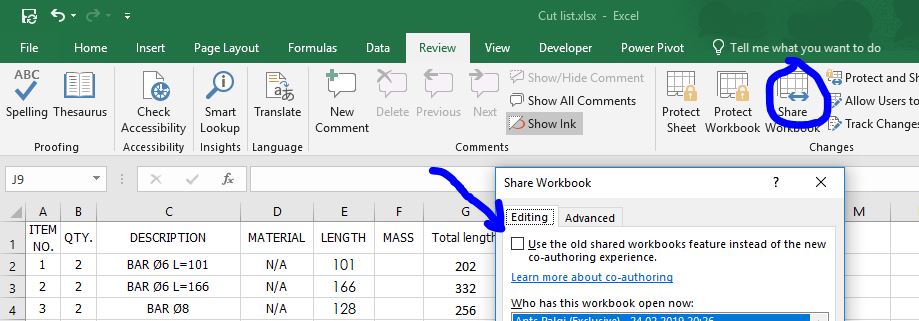
Firstly, remove the “Share Workbook” feature as it locks all the advanced worksheet editions as such:
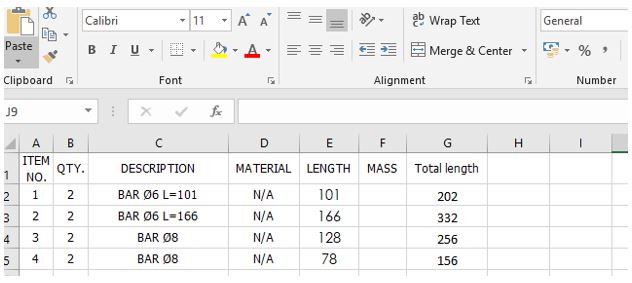
Secondly, you need to multiply the profiles quantity with length. This is important when there is more than one profile.
The third and final step towards the desired result is to use Excel’s data Subtotals functionality, but have the data sorted by Description value first.
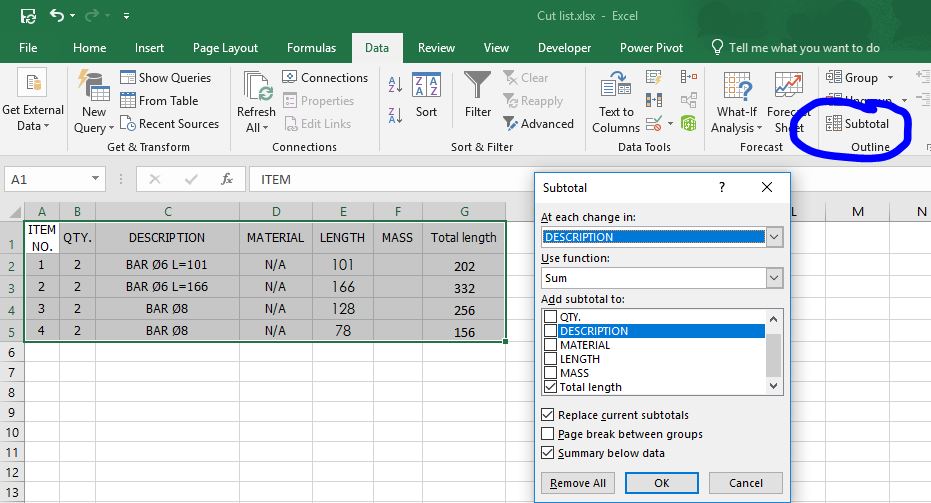
Literally each time when the description changes, the Subtotals sum “Total Length”.
After hitting “OK” the table should look like this:
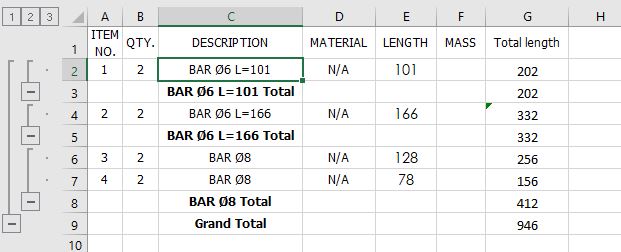
Hopefully you now see the value in keeping descriptions without length, as it allows you to clearly see that the total need for BAR D8 is 412mm. For BAR D6 this is not so clear. Fact is, that length value is different, therefore preventing the Subtotal function from calculating the total quantity.
During profile creation it’s smart to look at the data need all the way to the end of the value adding cycle. When the company needs to plan profile purchases in Excel, then it’s good to keep sorting fields. When everything is going through the ERP system and there’s “AI” deciding when and what to buy, then there should be data planned for the whole system.
Don’t decide simply by whether it looks good or not. Functionality over form.
And as always, thanks for reading and we look forward to hearing your thoughts in the comments.